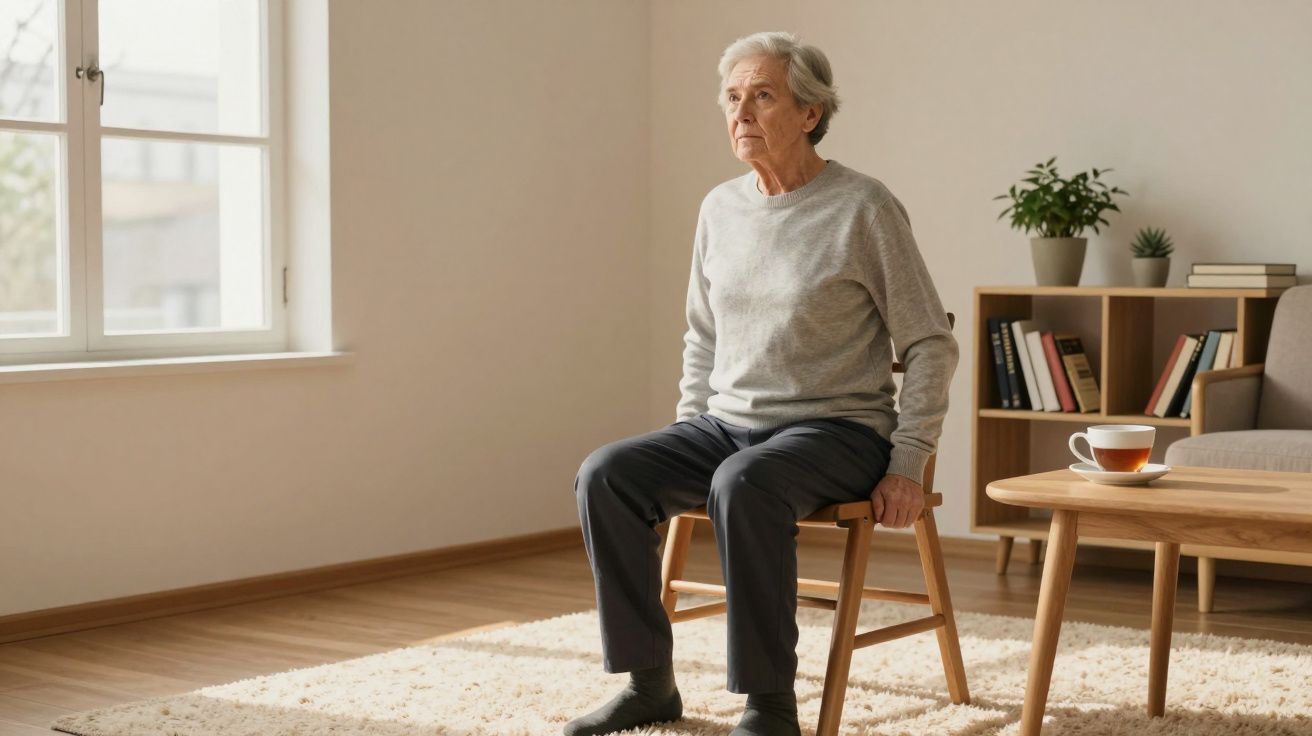
You notice it most when you stand up after a long cup of tea.
Your step counter is delighted: ten thousand steps again, the app flashes its little fireworks, and yet your hips still feel stiff, wobbly, a bit untrustworthy on that first move away from the chair. The walk was meant to protect you. Instead, you’re half‑bracing yourself on the table.
In a quiet clinic room, geriatricians and physiotherapists watch this moment very closely. They see strong hearts and decent lung capacity in people who walk every day. But they also see the same pattern repeated: weak hip muscles, slow reactions, and a growing fear of falling that makes each outing feel like a small gamble.
That’s why more and more of them are saying a slightly uncomfortable thing out loud: after about 65, long walks alone are not enough to protect your hips. What changes the game is what you do with a simple, stable chair.
Not fancy gym machines. Not brutal squats. A normal chair, used very deliberately, for a few minutes at a time.
Why your hips need more than long walks after 65
Walking is still a good habit. It keeps your circulation moving, lifts your mood, helps blood sugar and blood pressure, and gets you out of the house. Geriatricians rarely tell people to stop walking unless there’s a very specific medical reason.
The trouble is that walking is mostly “steady, low load” work. Your hips repeat the same small range of motion thousands of times, but they’re rarely asked to push hard, stabilise suddenly, or hold your whole body as you change direction. Those are exactly the jobs your hips need to do when you trip on a kerb or get up from a low sofa.
After about 60–65, several things quietly shift:
- Muscle mass in the legs and hips tends to shrink.
- Reaction times slow down.
- Balance systems in the inner ear and eyes are less sharp.
- Cartilage and tendons may already be carrying decades of wear.
Put together, that means your hips no longer just need “more movement”. They need targeted strength and control. Strong gluteal muscles, deep hip stabilisers, and thigh muscles that can fire quickly and reliably.
A chair is perfect for this. It gives you:
- A fixed height so you can repeat movements safely.
- Something solid to hold for balance.
- A clear limit: you sit if you lose strength, instead of falling.
Geriatricians like chair exercises because they improve the things that actually keep people independent: getting off the loo, stepping into the shower, climbing a bus step, turning quickly in the kitchen. The walk around the block becomes safer once these basics are solid.
The 3 chair exercises geriatricians actually rely on
Before you start: choose a sturdy chair without wheels, ideally with armrests, and place it against a wall so it cannot slide. Wear flat, supportive shoes. If you’ve had a hip replacement, severe arthritis or frequent falls, ask your GP or physiotherapist to check these are appropriate for you.
1. Sit‑to‑stand “mini squats” – the independence builder
If geriatricians had to pick one exercise that predicts who will still be living independently in ten years, this is often it.
It looks almost too simple: you stand up from the chair and sit back down again. But done slowly and properly, it loads almost every key muscle protecting your hips – the front of your thighs, the buttocks and the deep muscles around the joint.
How to do it
- Sit tall on the front half of the chair, feet flat, roughly hip‑width apart.
- Place your hands on the armrests or on your thighs to start with.
- Lean your chest slightly forwards, as if you’re about to get up.
- Push through your heels and stand up smoothly until you’re fully upright.
- Pause for a second, then slowly bend your hips and knees to sit back down with control. Aim not to “drop” the last few centimetres.
Start with 5–8 repetitions, rest, then repeat once or twice. Aim for this exercise 3–5 days per week.
As you get stronger:
- Use your arms less, then not at all.
- Slow the movement down so standing and sitting each take 3–4 seconds.
- Hold something light (like a small bottle of water) to increase the challenge.
If your knees or hips hurt sharply, shorten the movement so you only come halfway up, or lower slowly to the chair from standing without actually sitting fully. Pain that lingers or worsens needs a professional opinion.
2. Seated marches – training your step and stride
Every time you lift a foot to clear a step, your hip flexor muscles and lower stomach muscles have to work together. When they weaken, people start “shuffling” or catching their toes, which is a common way to fall.
Seated marching wakes these muscles up without the risk of losing your balance.
How to do it
- Sit tall, back away from the chair so your feet are flat under your knees.
- Lightly hold the sides of the chair for support.
- Tighten your lower tummy as if zipping up slightly tight trousers.
- Lift your right foot a few centimetres off the floor, keeping your knee bent, pause, then lower with control.
- Repeat with the left foot, alternating like a slow march.
Aim for 20–30 steps in total (10–15 per leg), rest, then repeat once or twice.
To progress over several weeks:
- Lift your knees a little higher, as if stepping over a low box.
- Slow the movement so each lift and lower takes 2–3 seconds.
- Loop a light resistance band around both ankles to add gentle pull.
If your back starts to ache, make the movements smaller and check that you’re not collapsing into the back of the chair – think of growing taller through the crown of your head.
3. Outward hip presses – the hidden stabiliser drill
Strong hips are not just about moving forwards and backwards. They need to control movement side to side, especially when you step off a kerb, walk on uneven ground, or catch yourself from a sideways wobble.
For this, geriatricians often prescribe a simple seated abduction drill: pressing your knees outwards against a gentle resistance.
You can use a soft exercise band looped round your thighs, just above the knees. If you don’t have one, even the “squeeze” version with a cushion between the knees can start to wake the right muscles up.
How to do it with a band (outward press)
- Sit tall with the band looped round both thighs, just above the knees, feet flat and hip‑width apart.
- Gently tighten your tummy and rest your hands on your thighs.
- Slowly press your knees outwards against the band until you feel the muscles in the sides of your hips working. Keep your feet still.
- Hold for 3–5 seconds, then slowly relax.
Aim for 10–15 presses, rest, then repeat once. The effort should feel like a 6 or 7 out of 10 – working, but you can still breathe and talk.
How to do it with a cushion (inward squeeze)
- Place a small cushion or folded towel between your knees.
- Squeeze your knees together gently, hold for 5 seconds, then relax.
- Repeat 10–15 times.
The outward and inward versions work different parts of your hip “corset”. Many physiotherapists alternate them across the week.
If you feel sharp pain in the groin or on the outside of the hip, reduce the effort or range. Discomfort that persists needs checking.
Turning three moves into a “hip shield” routine
On paper, these exercises take about ten minutes. In real life, ten minutes easily disappears into the day unless you tie them to something you already do.
Geriatricians often suggest “habit anchors”:
- Sit‑to‑stands while the kettle boils.
- Seated marches during the adverts of the evening news.
- Outward hip presses when you first sit down with your morning paper.
You do not have to sweat or gasp for them to work. Muscles respond to consistent, repeated signals, not heroic one‑off efforts. Three short sessions each week, done steadily over months, often make more difference than a burst of enthusiasm followed by nothing.
Soyons honnêtes : personne ne fait vraiment ça tous les jours. The real goal is “often enough to matter”.
A simple starting plan:
- Monday – Sit‑to‑stands + outward hip presses.
- Wednesday – Seated marches.
- Friday – All three, but with fewer repetitions each.
If you already walk regularly, slide this routine on to days when you’re at home more, or after shorter walks. Over time, many older adults notice that pavements feel less threatening and stairs feel less like a test.
When walking still matters (and when to be careful)
None of this replaces walking altogether. For most people, a mix works best:
- Chair strength work for hips, thighs and balance.
- Walking for heart, lungs, mood and social contact.
What geriatricians want to avoid is the well‑meaning person who pushes through longer and longer walks while their hips get sorer and sorer, then cuts back completely when the pain scares them. The result is weaker muscles, stiffer joints and more fear.
Instead, they suggest:
- Keeping walks comfortably challenging, not exhausting.
- Using hills and stairs sparingly if your hips are already irritated.
- Adding chair work on days when your joints feel calmer.
You should stop and seek advice if you notice:
- Sudden, sharp hip or groin pain.
- Pain that wakes you at night or does not ease across a few days.
- Leg giving way, buckling or repeatedly catching on the ground.
- Any new difficulty controlling your bladder or bowels.
Your GP, geriatrician or physiotherapist can then help tailor or replace these exercises as needed.
Quick checklist before you start
- Use a stable, non‑swivelling chair against a wall.
- Keep movements slow and controlled, not bouncy.
- Work at a mild to moderate effort – you feel the muscles but can still talk.
- Breathe naturally; avoid holding your breath.
- Stop if you feel dizzy, very breathless, or have chest pain.
If in doubt, especially with existing heart, lung, or joint conditions, get personalised clearance from a professional who knows your history.
Key hip‑protecting moves at a glance
| Exercise | Main target area | Everyday benefit |
|---|---|---|
| Sit‑to‑stand mini squats | Thighs, buttocks, hip extensors | Standing up from chairs, loos, beds |
| Seated marches | Hip flexors, lower core | Lifting feet to clear kerbs and steps |
| Outward hip presses | Side hip stabilisers | Sideways balance, steady walking on uneven ground |
FAQ:
- Are chair exercises really “better” than walking for my hips? They’re better for specific things: hip strength, control and balance. Walking is still valuable, but chair exercises target the muscles that keep the joint stable and protect you if you trip or turn suddenly. Together, they work better than either on its own.
- How often should I do these exercises? Many geriatricians are happy if people manage them 2–3 times per week to start with. If that feels easy and your body tolerates it well, you can build up towards most days.
- Will these exercises wear out my hip joints faster? Done with good form and within a comfortable range, they usually support the joint by strengthening the muscles around it. Sharp or worsening pain is a signal to stop and get professional advice.
- What if I already have a hip replacement? Many people with replacements do chair exercises, but your surgeon or physiotherapist may have specific rules about how far you can bend or rotate. Check with them before starting or changing any programme.
- Do I need resistance bands and special gear? A sturdy chair is the only real essential. Bands can be helpful later, but you can make good progress at first with just body weight and simple props like a cushion or towel.


Comments
No comments yet. Be the first to comment!
Leave a Comment